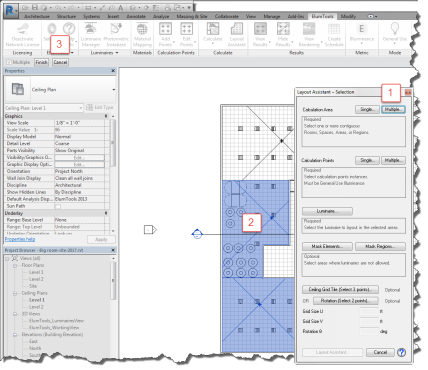

The selection dialog controls the initial input to the Layout Assistant. The most common use case of the Layout Assistant has been described in the topic Basic Operation for a Single Room. Details regarding the Layout Assistant dialog, which opens following the inputs discussed here, can be found in the Layout Assistant Dialog topic. Integration of daylight with Layout Assistant is discussed in a separate topic.
The following examples illustrate additional capabilities beyond the basic operation of the dialog.
It can be convenient to have the Layout Assistant operate on multiple boundaries that may be contiguous. To do this, select the Multiple button in the Selection dialog, then select the boundaries one by one. When all are selected, click the "Finish" button on the Revit Options Bar (above the Properties window). The Layout Assistant will then treat the multiple boundaries as one. Selected boundaries will be listed in the Selection dialog.
Consider the following example of contiguous rooms. After selecting Layout Assistant:
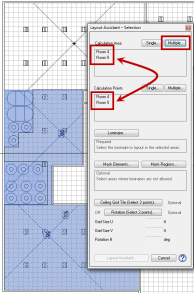
| Layout Assistant will automatically pick up any calculation point instances that are associated with the Calculation Areas selected in the previous section of the dialog. For example: if you have selected two Rooms and both already have calculation points assigned to them, Layout Assistant will find those points and use them as the basis for the estimation process. When using multiple calculation points instances, Layout Assistant will seek to meet the illuminance criteria on all point instances. |
|
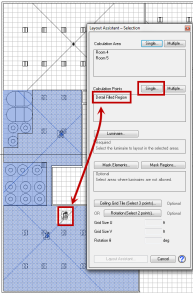
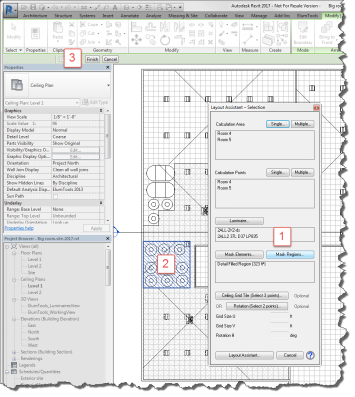
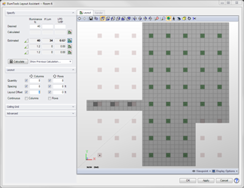
| It is possible to select calculation point instances that are not associated with the calculation areas selected. In this case, click on Single or Multiple in the Calc Points section of the dialog, all calc points already associated with the calculation area will be removed and you can select other instances to be used. In this case we have selected the filled region that avoids the tall vessels in the rooms as the calculation point grid of interest. |
|
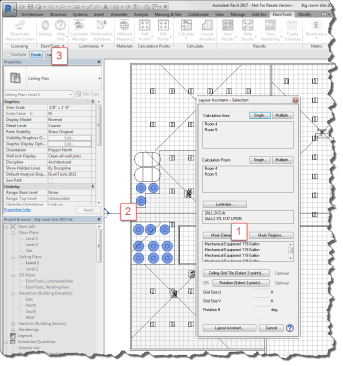
Layout Assistant allows areas to be masked as off-limits when placing luminaires. Luminaire types other than that used for the intended layout are masked as it is assumed that they cannot occupy the same space as newly placed results. As a couple of examples of practical masking, imagine industrial equipment that extends very close to the ceiling, or a jog in the room boundary that you are not interested in considering.
Layout Assistant provides two methods to mask an area: by selecting the elements within Revit, or by selecting a previously created Region.
Mask Elements
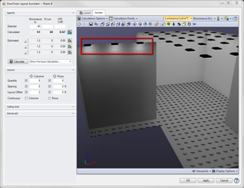
The Mask Elements method is powerful and useful for structure or geometry that may not be room bounding such as industrial equipment. As a special use case, it can also be used for luminaires of the same type as designated for use by the assistant. In this case, rather than removing the luminaires, they will remain in place (see special case below).
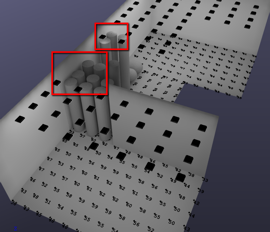
In the example shown we are selecting the large cylindrical objects on the left side of the two rooms.
The area covered by the selected objects is masked from luminaire placement.
|
|
Mask RegionsThe ability to mask an area by selecting a region previously created in Revit is extremely easy and powerful. Using this option you can simply block out any area in which you do not want luminaires to appear with a Region (Masking or Filled).
The masked area is excluded from luminaire placement.
|
|
As an effective demonstration of the two methods above, consider the three contiguous rooms shown below with both element and area masking operations performed.
|
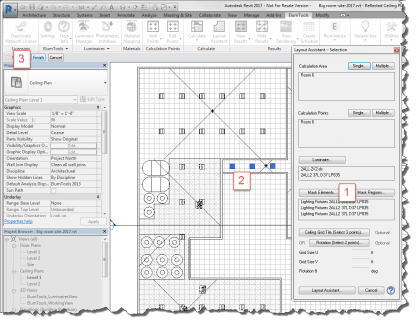
When using the Layout Assistant, any existing luminaire instances of the same type you have selected for the layout, are removed by the Assistant when it performs its new layout estimates. However, if there are instances that you would like to protect them to remain in the area, AND be considered in the calculations, you can do this by masking these instances.
Consider the example shown: a room with a hallway. It might be easiest to allow the Layout Assistant to work on the large area while placing luminaire instances in the hallway separately. You can protect the instances in the hallway by masking, yet have them considered in the layout and subsequent calculations.
|
|
|
|
|
Ceiling Grid
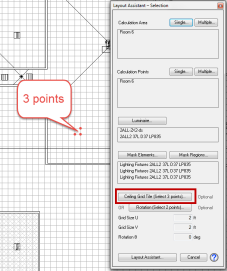
A ceiling grid is not required by the Layout Assistant, although if your area of interest will contain one, it is suggested you include it. We also suggest you attempt to situate the grid in the Room/Space as it will be installed. This is often a guess, but at least you have a chance of getting the luminaires where you really want them if you lock the ceiling grid in Revit.
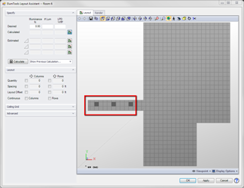
To include the grid:
|
|
|
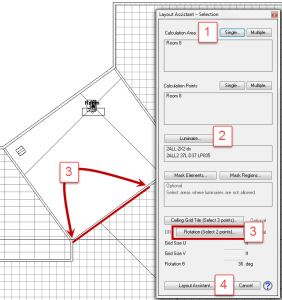
If there is no ceiling grid in the room, you can skip the Ceiling Grid specification and the luminaires will be arranged in columns and rows in a North/South, East/West orientation. However, if your Room or Space is angled and you want your luminaire layout to be aligned with the walls, set a Rotation angle in Layout Assistant.
|
|
ElumTools copyright 2018 Lighting Analysts, Inc.